Welcome artists and parents!
This blog page is dedicated to the art club students. It is a place to:
-retrieve the assignments
-get forms
-ask questions
-share opinions and suggestions
-or just talk about art!
In this first post I will publish all the art club forms and previous activities as a reference.
Art Club Schedule
2011-2012
The dates always fall on the last Wednesday of each month.
The set schedule is from 2:00 pm to 3:00 pm.
|
Month
|
Dates
|
September
|
28
|
October
|
26
|
November
|
|
January
|
25
|
February
|
22
|
March
|
28
|
April
|
25
|
May
|
30
|
|
|
Please keep this schedule handy for reference.
Thank you for your collaboration in helping your child becoming a better artist.
Art Club Activities
Goals
Bring artists or hobbyists together to improve skills, compare work, share in the cost of materials and participate in different group events. The members explore various techniques and use an assortment of mediums that they may or may not experience in regular art classes.
Schedule of activities
During the first half hour we explore something new together; the rest of the time members experiment or work on their own. Art Club members are required to complete weekly drawing assignments in their sketchbook.
Group Shows
A group show is one way to get all of the artists in an art club working toward a common goal and motivated to meet project deadlines. A simple art club show for young students may involve setting aside a school hallway or wall in the library and inviting families to the opening of the exhibition, which remains in place for fellow students to see.
Field Trips
Art club field trips bring members into contact with other art in the region. A visit to an art museum or local gallery opening keeps the club members aware of current trends, while also bringing them face-to-face with the art history of textbooks.
Art clubs also could visit artists' studios. The members can watch professional artists at work and learn about the tools needed to produce sculptures, paintings and photographs.
Sales
Art club sales serve two distinct purposes: to put the club's work on public display and to provide funding for the club and income for its members. Sales held in a public place may help stir up interest in the club. To sell to a more discerning group of buyers, strike a deal with a shop or gallery owner.
Visiting Artists
Spending time with practicing artists can be an invaluable tool for art students. Art clubs can serve as hosts for artists who live locally or are in town for an exhibition or sale. Artists may even be able to find apprentices or interns from among an art club's members, offering those with a serious interest in art a chance to see the process up close. All members can benefit from an artist's life story and the chance to ask questions about surviving in the challenging and competitive art market.
Arts and Technology
We will explore many tools using technology. We will also visit interactive art softwares, museum art sites and lessons.
Tools
Lessons
Museums
Clay Marionettes and Puppets
Supplies
Model Magic, Markers,Yarn, Sticks
Crayola Model Magic Clay - What is it?
A soft, easy-to-use modeling material
Blend colors
Build sculptures
Cover & decorate a variety of forms
Can be colored with Crayola paint
& markers
Air-dries to the touch in 24 hours
Cleans up easily
Nontoxic--recommended for children ages 3+
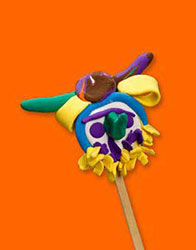
Steps to create Puppets
1) Knead the color from Crayola® Washable Markers into Crayola Model Magic to get any color you like. Add texture by braiding "snakes" together. Press a pattern into the soft modeling compound with your fingernail or a craft stick. Shape a cowboy, animal, or other any character. Add accessories such as yarn for a rope.
2) Poke a craft stick into the bottom of your sculpture to create a puppet. Air-dry your puppet and it’s ready to ride, or roam, the range!
Steps to create Marionettes
Create a clay marionette from a character you know or one that you create.
1) Make a pinch pot head to approximate size given - add facial features and carve features. Make sure head is hollow - put pin hole in back of head for air to escape. Shape into chin and neck. Put small hole in neck for tying to body - put hole through at top for stringing
2) Cut body section - make impressions for knots of arms and legs put holes and tie on arms and legs with string. Put hole towards bottom of body for string - this will help the marionette to take a bow.
3) Cut out and shape hands and feet/shoes - put hole in for string up. Alternate suggestion: put holes in knees to give a walking motion - using one long string for legs. Make impression for knots on hand and feet (or small holes to tie on with string).
4) Make knees and elbows - use straw to put hole through.
5) Put name on back of body - keep all parts together on wood boards for drying.
|
Graphic Art
A type of fine art, graphic art covers a broad range of art forms. Graphic art is typically two-dimensional and includes photography, drawing, painting, printmaking, lithography, typography, serigraphy (silk-screen printing), and bindery. Graphic art also consists of drawn plans and layouts for interior and architectural designs.
[1] Today, graphic art is usually associated with commercial art that is used in marketing. In this case, the purpose of the graphic art is to capture the interest of the audience on the product or service in order to increase the volume of business.
[2]
Graphic artists applying for positions in today's job market are expected to be familiar with computers and a variety of software in order to create the most appealing, up to date designs. Besides computers and software, graphic artists are also expected to be creative with processing camera work, registration, crop marks, and masking.
[2] One of the most common career paths for a graphic artist today is web design.
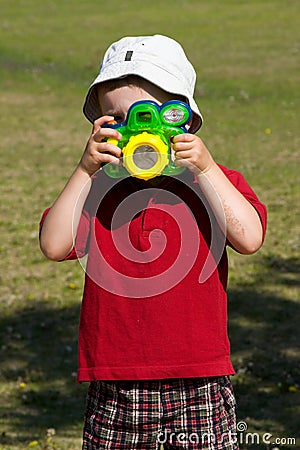
Microsoft Paint
The tutorials Ellipse and Curve will show you how to use the tools you will need to make a successful drawing of a hamster. Try this first. Drawing a Hamster: http://esbergen.org/ict_Year_1_and_2/Paint/ellipse.htm
Watch the Tutorials, keep them in the background and look at them now
and again while you practice drawing the hamster.
You only have 3 Undos in Paint, so plan well and save regularly.
After the hamster try these........ A dog ,
A cat ,
A horse ,
A seahorse ,
A rat,
A bird
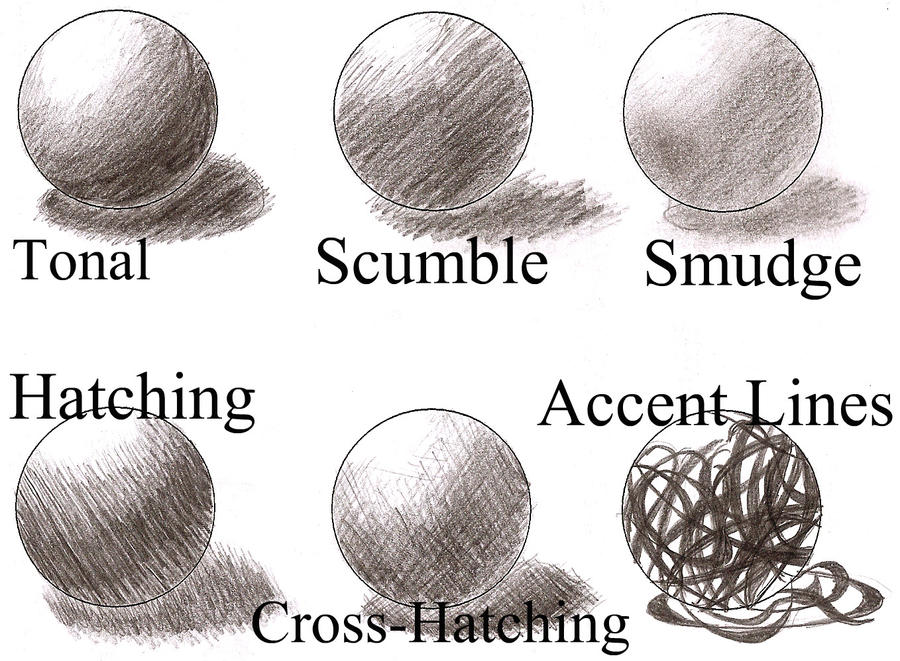
Shading
Drawing
Example of shading.
Shading is a process used in drawing for depicting levels of darkness on paper by applying media more densely or with a darker shade for darker areas, and less densely or with a lighter shade for lighter areas. There are various techniques of shading including cross hatching where perpendicular lines of varying closeness are drawn in a grid pattern to shade an area. The closer the lines are together, the darker the area appears. Likewise, the farther apart the lines are, the lighter the area appears. (Reference:
http://en.wikipedia.org/wiki/Shading)
Shading Techniques:
http://fc08.deviantart.net/fs70/i/2010/012/6/c/Shading_Techniques_by_Yukina_Kun62.jpg
Exercise 1
Graduated Tone
Graduated tone can be used to create the illusion of space and form in a drawing. It is a very useful skill to develop.
Use a B, 2B, or darker grade of pencil for your shading. Lighter grades (H, 2H etc.) will not give enough depth to your darkest tones.
Just start by shading the area you wish to be dark and slowly build up the tone. As you work towards the light, gradually ease the pressure on your pencil until you can no longer the mark it makes. You then patiently repeat this process, building a depth to the shading, adjusting any irregular areas and trying to keep the tonal changes as smooth as possible until you achieve the intensity of tone that you desire.
Below are some more exercises of increasing difficulty which will test your shading skills to the limit.
The 6 Things To Know
•Know your camera
•Hold the camera still
•The 2-second rule
•Take a few more
•Tell a “story”
•Capture the “mood”
C . E . L . L .
•C omposition
•E xposure
•L ens
•L ight
Photo Galleries
•Corbis Images


